2015 is getting off to a strong start with another Hiveword feature — Chapters!
In a book, a chapter is comprised of one or more scenes. The grouping of the scenes in a chapter has a purpose — perhaps it’s comprised of one particular plotline, or a new character comes along, or whatever your heart desires. The chapter feature in Hiveword allows you to organize your chapters by specifying a summary or purpose and by assigning scenes to those chapters. Let’s see how it works…
First of all, chapters get first class treatment with their own menu:
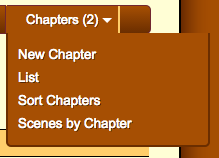
You’ll see that the Chapters menu is consistent with characters, settings, etc., in that you can create, list, and sort chapters. I’ll talk about Scenes by Chapter later.
Here’s the relevant part of a chapter page:

You can see that I called the chapter “Beginnings.” I did that by clicking on the chapter name and editing it (by default it was “Chapter 1”). The Summary box allows you to capture whatever you’d like about the chapter. Note that scenes are still the main unit of work in Hiveword and chapters are just a layer over scenes. You wouldn’t want to put all of your scene summaries in the chapter summary box. Rather, describe the chapter at a higher level.
You can also tag chapters with any text you want. Tags work the same way as they do anywhere else in Hiveword.
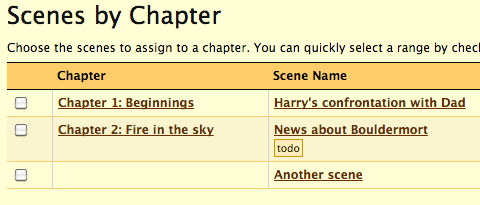
Once you have chapters you can assign scenes to them with the Scenes by Chapter page which is the last option on the Chapters menu. Here’s a screenshot:

In the screenshot above I have three scenes. The first is already assigned to chapter 1 because I did that earlier. I now want to add the Bouldermort scene to chapter 2 so I selected it, chose the chapter in the dropdown, and pressed Save. Upon saving the page is refreshed:
So, out of my three scenes, two of them are assigned to chapters. Obviously, I can assign more than one scene to a chapter but selecting the ones I want. If you have a lot of scenes to assign to a chapter you can quickly select all of them by clicking the start scene and shift-clicking the end scene. Those two scenes and all of the ones in between will be selected. You can then continue like normal.
Now here’s the cool part. When you go to the chapter list page you get something like this:

On this page you will see all of your chapters, of course, but you’ll also see roll-ups of the scenes within those chapters! So, you can see at a glance the number of scenes in a chapter, which characters appear in the chapter, which settings, etc. The bottom row is simply a placeholder for all scenes that are not assigned to a chapter. Pretty nifty screen, huh? 😉
The last component of chapters is the chapter sorter. It works exactly like the other sorters but with one distinction that you should understand before you use it. The scene and character sorters, for example, merely sort the individual entries. Sorting chapters, however, implies that you are also sorting scenes. For example, in the screenshot above, moving chapter 2 to be first means that the scene in chapter two will be placed before the scene in chapter one. The same thing would apply if there were multiple scenes in a chapter — the whole range of scenes would move but the order within the chapter stays constant. Basically, where the chapter goes the scenes go, too. It makes sense and I believe it’s intuitive but I just wanted to mention that so that you’re not surprised.
Finally, I’d like to point out that using chapters is purely optional. You only need to do as much organization as you want to.
So, that’s chapters, folks! I hope you like it and feel free to ask questions or make comments below.
Hey Mike! I figured out how to use the name generator but not the location generator. Will you help with this please. By the way, Hiveword is AMAZING!!!
Hi, Shelly. Sorry for the delay in responding…
Please have a look at http://hivewordhq.com/2012/07/01/location-generation/ to see how location generation works.
Thanks for the kind words. I’m glad you like it!
Thank you for the Chapter organizer! Great!
Comments are closed.